This week’s question comes from my dad! I gave him a lesson in person, and have written it up for all of you.
Q: What’s the difference between photographing scenery and photographing people? -Steve S., Cleveland, OH
A: You will want to use the light very differently for people and scenery. For people, you want to downplay any fine lines and flaws, and for scenery, enhancing the details looks best.
Please note: this lesson was taught using an iPhone 4S, so you won’t need a DSLR or any special equipment to try it out.
We had a bright sunny day to demonstrate this theory. I started out my holding my hand out in the bright sunlight, and asked my dad to notice how sharp the shadows were. The smaller the light source, the more defined the highlights and shadows will be. Since the sun is very far away, it acts as a very small light source, unless it is covered by clouds. On a cloudy day, the sky “diffuses” the sunlight, making the entire sky into the light source, instead of just the tiny sun.
On a day like today, it is entirely possible to get both the scenery shots you want, and the portait-style people shots. You simply have to be aware of where the light is falling.
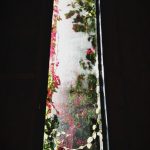
For the shot of the scenery, I showed my dad the details visible by capturing the leaves on a nearby tree in this light. Especially when photographing things at a long distance, the sharpness provided by crisp shadows can really make your landscape and scenery photos pop. But by taking the time to photograph some leaves at a closer distance, you’ll give yourself a clearer sense of how the bright sun creates crispness of details.
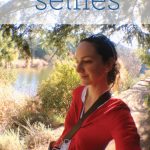
Once I showed him this part of the lesson, I asked Dad to step into a shaded area against his house. He was facing towards the open sky and a large patio — each reflecting the bright light of the sun, but as very large bounced light sources (as opposed to the tiny direct source of the sun itself). This means nice, even lighting was across his face, in a very flattering way. (I totally have my dad’s hands, by the way.)
On a sunny day, you can also take your subject indoors by a large window. The size of the window is now the size of your light source. Notice the size relationship between your subject and the light source. If the window is much larger than their face, and you’re able to place them just a few feet from it, you will have flattering light.
It’s not impossible to photograph someone out in bright sunlight, but you will always want the subject to be in between you and the sun, and make sure there is something that is reflecting sunlight back up onto your subject’s face. Otherwise, shade, window-light, or a cloudy day are best for people shots.
Bonus Material: The portraits in this post were edited using the VSCOcam app on my iPhone. The landscape shots were only slightly enhanced for contrast in PhotoShop – what you see here is very close to what the iPhone actually recorded.
Hope this tip is helpful, and feel free to share your experiments with me on twitter!


